Table of Contents
Introduction
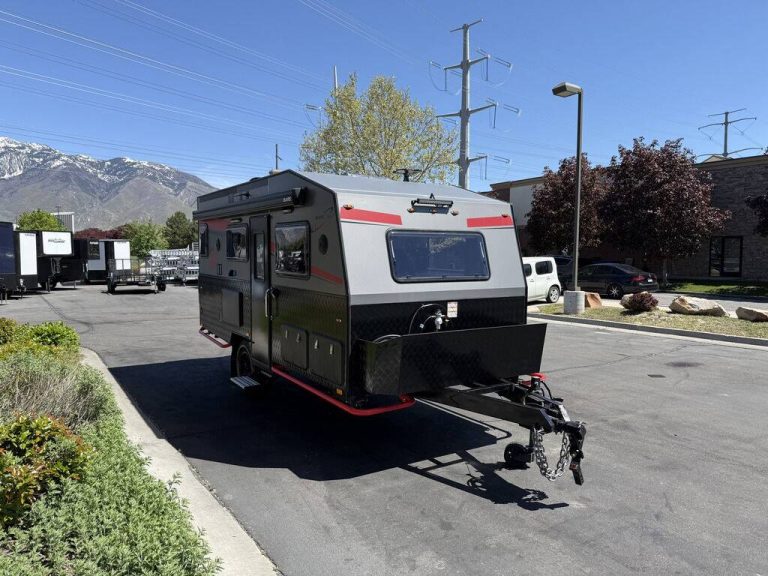
Spring RV Roof and Seal Inspection is a seasonal maintenance process that checks the condition of an RV’s roof membrane, seams, vents, skylights, and sealants after winter storage. Cold temperatures, snow accumulation, and long-term storage can cause sealants to crack or shrink, creating small gaps where water can enter.
In the United States, search interest for RV maintenance topics—especially “RV roof inspection checklist” and “RV roof leak prevention”—spikes every spring as RV owners prepare for the camping season. A proper inspection helps detect early warning signs such as loose seals, aging sealant, or hidden moisture damage before they turn into costly structural problems.
This guide explains:
Why spring is the most important time for RV roof inspections
A practical RV roof inspection checklist
Step-by-step instructions for inspecting roof seals
Preventive maintenance tips to avoid leaks throughout the travel season
For a broader overview of seasonal RV care, see the internal maintenance resource:
➡️ https://www.marsrvs.com/maintenance-checklist-for-travel-trailers-full-safety-guide.html
What Is Spring RV Roof and Seal Inspection
Definition
Spring RV roof and seal inspection refers to a routine maintenance check performed at the beginning of the camping season to evaluate the condition of roof materials, sealants, and rooftop fixtures. The goal is to identify early damage caused during winter storage or harsh weather conditions.
This inspection focuses on critical areas where leaks typically occur:
Roof seams and joints
Vent and skylight seals
Air-conditioning base mounts
Roof edges and trim rails
Why Spring Is Critical
Search trends in the U.S. show that many RV owners begin preparing their rigs between March and May. After months of inactivity, several factors can compromise roof integrity.
Winter Storage Damage
Cold weather causes sealants to contract and lose flexibility. As temperatures fluctuate, these materials may crack or separate from the roof surface.
Moisture and Snow Exposure
Snow buildup and freezing rain can create hidden moisture that slowly penetrates weak seams.
Pre-Season Travel Preparation
Spring inspections ensure your RV is road-ready before long camping trips.
Maintenance guides emphasize that early inspections reduce the risk of structural water damage. Even routine trailer maintenance resources highlight roof and seal checks as essential seasonal tasks.
Typical Issues Found
Common problems discovered during spring inspections include:
Cracked or brittle sealant
Dried lap sealant around vents
Lifted roof seams
Small entry points for water
Many maintenance reports identify roof leaks as one of the most common structural problems affecting travel trailers after storage.
RV Roof Inspection Checklist
A structured RV roof inspection checklist helps ensure no critical areas are overlooked.
Exterior Roof Inspection
Start with a careful visual inspection of all exterior roof components.
Check the following areas:
Roof membrane surface
Front and rear roof seams
Roof edges and trim rails
Air conditioner mounting seal
Skylight frames
Plumbing vents
Antenna mounts
Look for signs such as bubbling, cracks, discoloration, or loose material.
Sealant Condition Check
Sealant plays a critical role in waterproofing the RV roof. Over time it may deteriorate.
Inspect for:
Cracking
Shrinkage
Peeling edges
Discoloration or chalky texture
Flexible, well-bonded sealant usually indicates healthy protection.
Interior Leak Indicators
After inspecting the roof exterior, move inside the RV.
Watch for:
Ceiling stains
Soft wall panels
Musty odors
Damp corners or cabinets
These interior clues often reveal hidden roof leaks.
Example Inspection Table
| Roof Inspection Area | What to Check | Risk Level |
|---|---|---|
| Roof membrane | Cracks, punctures, bubbles | Medium |
| Seams & joints | Separation or lifted edges | High |
| Skylights & vents | Sealant cracks | High |
| Roof accessories | Loose mounting seals | Medium |
How to Inspect RV Roof Seals (Step-by-Step)
Many RV owners search for “how to inspect RV roof seals” because the process can be done safely without specialized equipment.
Step 1 – Clean the Roof Surface
Before inspecting, remove debris from the roof.
Clean off:
Dust
Leaves
Dirt buildup
A clean surface makes it easier to detect cracks or separation.
Step 2 – Visually Inspect All Seams
Focus on high-risk areas including:
Roof joints
Vent openings
Skylight frames
Look closely for uneven sealant or exposed gaps.
Step 3 – Check Sealant Flexibility
Lightly press the sealant with your finger.
Soft and flexible: still effective
Hard or brittle: likely aging
Loss of flexibility often means resealing may soon be required.
Step 4 – Identify Early Leak Points
Pay attention to:
Small gaps in sealant
Raised edges along seams
Uneven or thinning sealant layers
Early detection prevents moisture from reaching insulation or structural components.
RV Roof Seal Maintenance Guide
Regular seal maintenance extends the lifespan of the entire RV roof system.
Regular Resealing
Sealants gradually degrade due to sunlight and temperature changes.
Best practice:
Inspect at least twice per year
Repair small cracks immediately
Routine maintenance prevents leaks from forming.
Cleaning Practices
Avoid aggressive cleaning methods that damage roof materials.
Recommended approach:
Use mild cleaning solutions
Avoid abrasive brushes
Rinse thoroughly
Seasonal Inspection Routine
Most experienced RV owners follow a seasonal inspection schedule.
Typical routine:
Early spring inspection
Mid-season check during heavy travel
Pre-winter storage inspection
Following a structured routine aligns with general trailer maintenance guidelines that emphasize regular inspection to prevent costly damage.
RV Roof Leak Prevention Tips
Preventive maintenance is the most effective strategy for protecting an RV roof.
Tip 1 – Inspect After Severe Weather
Storms, heavy rain, and snow can weaken sealants.
Always check the roof after extreme weather.
Tip 2 – Monitor Sealant Aging
Sealant naturally degrades due to:
UV exposure
Temperature changes
Long-term storage
Watch for early signs of deterioration.
Tip 3 – Keep Roof Debris Free
Leaves and dirt trap moisture, accelerating sealant breakdown.
Regular roof cleaning reduces this risk.
Tip 4 – Check Roof Accessories
Many leaks originate around mounted equipment.
Inspect:
AC base mounts
Vent housings
Ladder attachments
Even small gaps around these fixtures can allow water intrusion.
Common RV Roof Problems Found in Spring
Spring inspections often reveal issues caused by winter weather or inactivity.
Dry or Cracked Sealant
Temperature fluctuations cause sealants to shrink and harden.
Seam Separation
Older RVs may develop small gaps along roof seams.
Minor Water Intrusion
Early water infiltration often appears as small ceiling stains.
If addressed quickly, structural damage can be avoided.
Membrane Wear
Prolonged UV exposure can weaken roof membranes and increase vulnerability to leaks.
Spring RV Maintenance Checklis
Here is a quick reference checklist for Spring RV Roof and Seal Inspection.
✔ Inspect the roof membrane for cracks or damage
✔ Check sealant around vents and skylights
✔ Clean roof surfaces before inspection
✔ Look for interior leak indicators
✔ Repair small cracks early
Visual tools such as maintenance checklist infographics are helpful reminders before the camping season begins.
For a more comprehensive maintenance overview, explore:
➡️ https://www.marsrvs.com/trailer-maintenance-checklist-pre-trip-annual-guide.html
FAQ
How often should an RV roof be inspected?
Most experts recommend inspecting the RV roof at least twice per year, especially after winter storage and before extended travel.
What causes RV roof seals to fail?
Seal failure typically results from UV exposure, temperature fluctuations, and natural aging of sealant materials.
Can small RV roof cracks cause leaks?
Yes. Even tiny cracks allow moisture to slowly enter the roof structure over time.
Is spring the best time for RV roof inspection?
Yes. Spring inspections help detect damage caused by winter storage and prepare the RV for the upcoming travel season.
Conclusion
A Spring RV Roof and Seal Inspection is one of the most important maintenance tasks before the camping season begins. By checking roof seams, vents, skylights, and sealants, RV owners can detect early signs of wear and prevent water intrusion.
Simple preventive steps—such as cleaning the roof, monitoring sealant flexibility, and following a seasonal inspection checklist—can extend roof lifespan and protect the RV’s interior structure.
The key principle is simple:
Preventive inspection is far easier than repairing water damage.
By incorporating a spring roof inspection into your RV maintenance routine, you ensure your camper remains safe, dry, and ready for the adventures ahead.